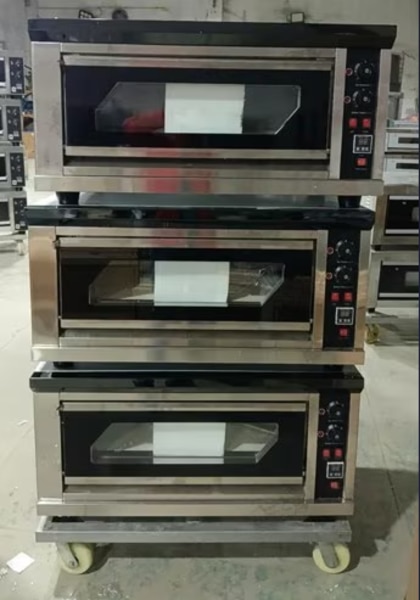
A displayed temperature of 200°C does not prove that bread, buns, cookies, biscuits or pizza will bake evenly from the centre of the deck to its edges. You will learn how to test heat uniformity, set loading and baking procedures, calculate useful capacity, verify electrical requirements and protect consistency through cleaning and maintenance.
Key takeaways
- Map deck temperatures before production and record hot and cool spots.
- Balance top heat, bottom heat and hearth contact for each product.
- Leave clearance for ventilation, servicing and safe electrical installation.
- Clean heating surfaces and inspect seals to preserve repeatable baking.
How Top Heat, Bottom Heat and the Hearth Create Uniform Baking
An electric deck oven produces uniform baking by balancing heat entering the dough from above, below and through the air. The set temperature alone cannot guarantee even colour, crust or oven spring.
- Hearth conduction heats the dough’s base and sets the bottom crust.
- Top heat radiates onto the surface, driving browning and colour.
- Moving hot air spreads heat around the product and reduces local cold spots.
The hearth material matters. A thick stone or steel deck stores heat and transfers it steadily to dough, helping oven spring during loading; a heat-starved hearth produces pale bases and slower expansion. Leave clearance around trays so radiant heat and airflow are not blocked.
Overloading creates pale areas even when the rated tray weight is not exceeded.
Use independent top heat and bottom heat controls to correct product changes. Increase top heat when the centre is baked but the surface is pale; increase bottom heat when thick dough or a cool hearth leaves the base under-coloured. One thermostat cannot make these corrections.
Thermostat cycling causes small temperature swings, while the door and perimeter lose more heat than the centre. Preheat fully, load consistently, and rotate trays only according to a tested procedure. A damaged door seal extends recovery time and creates a front-to-rear gradient, so uniform baking depends on the oven’s condition as well as its controls.
How to Prove Temperature Uniformity Before Production
A controller reading of 200°C does not prove that every part of the deck reaches 200°C. Test the oven at its intended set point with a calibrated probe, then compare positions and repeated loads.
| Test | Method | Evidence |
|---|---|---|
| Temperature mapping | Preheat fully, then measure the front, rear, left, right and centre at the same time. Repeat the map at the production set point. | Shows edge-to-centre variation and establishes actual temperature accuracy against the display. |
| Repeat-load test | Record each probe reading before loading, bake identical loads, and repeat for at least three cycles without changing settings. | Shows whether the oven returns to the same conditions from batch to batch. |
| Recovery test | Record the temperature drop after loading, then time how long each position takes to return to the target. | Measures heat recovery time and exposes slow recovery after a full load. |
Set an acceptance band before testing, such as the maximum difference allowed between the coolest and hottest positions. Reject a pass based only on the centre probe: a cool front edge can leave pale crusts while the centre browns correctly.
Run the tests with the normal door-opening pattern and product load. A damaged door seal, loose hinge or weak insulation increases heat loss at the front and creates a front-to-rear gradient. Repeat the map after repairs, and keep the signed readings with the commissioning record.
If top and bottom heat are independently adjustable, test each setting combination you will use in production.
Loading and Baking Rules for Different Products
Treat each recipe as a loading record, not just a temperature. Write down top heat, bottom heat, set temperature, baking time, steam injection or venting state, deck position and load quantity; also note tray material and dough or batter weight. This makes a changed batch reproducible.
| Product | Tray loading | Settings and checks |
|---|---|---|
| Bread | Leave clearance between loaves and the walls; keep spacing uniform for oven spring. | Record steam injection timing, vent-open time, top and bottom heat, temperature and baking time. |
| Buns | Use equal spacing and avoid filling the cooler door-side area beyond the tested quantity. | Record pieces per tray, tray position, steam state, rotation point, temperature and baking time. |
| Biscuits | Keep rows straight with gaps for airflow; use the same bright or dark tray used during testing. | Record dough weight, tray material, top and bottom heat, temperature, baking time and colour result. |
| Cookies | Allow spread room and leave a clear gap from the deck edges; do not crowd a full nominal load. | Record pieces per tray, dough temperature, tray position, vent state, temperature and baking time. |
| Pizza | Load the hearth or tray without blocking adjacent space; keep thickness and topping weight consistent. | Record base weight, deck position, top and bottom heat, temperature, baking time and recovery time. |
The door and perimeter are cooler than the centre, so specify positions and rotation rules. Rotate only at a recorded point; opening too early loses heat and can reduce bread volume. Recheck the next load after steam recovery before accepting its result.
Useful Capacity, Installation Clearance and Electrical Supply
Start with tray dimensions, not the oven’s advertised tray count. Usable production capacity is the number of trays that fit while preserving deck clearance around the walls, between trays and above the product.
Crowding blocks heat transfer, so a deck can produce pale edges and longer bake times even when its rated tray count or weight limit is not exceeded.
Before ordering, record these site and production figures:
- Tray length, width and height, including handles or rims
- Required trays per batch and batches per hour
- Product spacing, door-swing area and the clear aisle in front of the oven
- Wall, ceiling and side clearance required by the installation drawing
- Available voltage, phase, frequency, sanctioned load and earthing arrangement
Measure the actual route from unloading point to the final position. Check door widths, stair turns, lift dimensions and the oven’s shipping dimensions; an oven that fits the bakery floor can still be impossible to move inside.
Match the nameplate connection to the site. A 230 V single-phase supply is not interchangeable with a 400–415 V three-phase connection, and a three-phase oven is not a drop-in replacement for a single-phase model. Confirm voltage stability, breaker capacity, isolator location and cable sizing with a qualified electrician.
Leave the specified service clearance: blocked ventilation or a door that cannot open fully turns routine cleaning and repairs into production delays.
Cleaning, Maintenance and Supplier Checks That Preserve Consistency
Clean the hearth every day; flour, sugar, grease and carbonised residue create smoke, odours and uneven radiant heat. Remove loose debris only after the deck cools, and follow the manual for element-area deposits, steam ports and drain components. Never throw water onto a hot refractory surface: thermal shock can crack it.
Use this daily care checklist:
- Brush or vacuum crumbs from the hearth and door threshold.
- Wipe spills from accessible metal surfaces with the approved cleaner.
- Inspect the door seal for flattening, tears or gaps, and confirm the door closes evenly.
- Check that heating elements show no break, blister or darkened section.
- Record unusual smells, slow recovery or a front-to-rear colour change.
Schedule a documented weekly inspection of the door seal, hinges, latches, insulation edges and ventilation openings. Arrange technician checks at the interval in the service manual to test thermostat cycling, element current, temperature-sensor accuracy and terminal tightness. A damaged seal increases heat loss and recovery time, so replacing it can restore consistency before changing recipes.
Ask the supplier for the cleaning-agent specification, seal dimensions, heating elements, sensor type, calibration procedure and a written list of spare parts with part numbers. Vaibhav Enterprises can help you verify those details against the exact oven model rather than assuming parts fit across similar-looking units. Keep these records with batch logs.
Related products
 | Bakery Oven 1 Deck 1 Tray Electric Oven Get Best Quote Number Of Decks Single Deck Deck Size 103*78*51CM Dimensions (W x D x H)mm 645*510*155 MM Control Mode automatic Controlling mode AUTOMATIC Minimum... View product → |
 | Electric Deck Oven 1 Deck 1 Tray Electric Oven (Digital) Number Of Decks Single Deck Deck Size 400*600MM Dimensions (W x D x H)mm 107*72*44CM Control Mode AUTOMATIC Controlling mode AUTOMATIC c VOL.:220V... View product → |
Frequently asked questions
How do top heat, bottom heat and the hearth affect baking uniformity?
Top heat colours and sets the upper surface, bottom heat firms the base, and the hearth transfers heat directly into the dough. Balance all three to control crust colour, browning and oven spring.
How do you prove an electric deck oven has uniform temperature?
Measure several points in each deck with a calibrated thermometer after preheating, record the readings, and repeat the test at production temperature. Use the results to identify hot and cool zones before loading products.
What loading rules improve consistency for different bakery products?
Keep tray spacing, product weight, loading position and bake time consistent. Match the deck, hearth and heat settings to the product instead of using one programme for bread, pizza, pastry and cakes.
What installation and electrical details matter for a deck oven?
Confirm the oven's rated voltage, phase, current and cable requirements with a qualified electrician. Provide the manufacturer-specified service clearance, ventilation space and access for maintenance.
Which maintenance checks protect baking consistency?
Remove baked-on residue, clean the hearth and chamber, inspect door seals and heating elements, and record temperature checks. Ask the supplier for manuals, warranty terms, spare-parts availability and service support.
Related products
 | Electric Deck Oven 1 Deck 1 Tray Electric Oven With Stone Number Of Decks Single For Baking Bread/Bun Operation Type Automatic Power Source Electric Size Small / Mini Usage/Application Commercial, Bakery,... View product → |
 | Electric Deck Oven For Baking Biscuit/Cookies, Bread/Bun, Pizza Usage/Application Industrial/Commercial Operation Type Automatic Machine Body Material Stainless... View product → |
 | Deck Oven 1 Deck 1 Tray Electric Oven FN Power Source Electric Number of Trays 1 Tray Number Of Decks Single Deck Deck Size 640*455*180 MM Dimensions (W x D x H)mm 945*605*485 MM Control... View product → |
 | Electric Deck Oven Number Of Decks Triple For Baking Biscuit/Cookies, Bread/Bun, Pizza Operation Type Automatic Power Source Electric Oven Type Industrial Size Large... View product → |